
Asaas's interactive documentation allows you to test API calls directly within it! Follow the step-by-step guide below.
✅ Step 1: Create your account in the sandbox environment
Before testing, you need a test account:
- Go to: https://sandbox.asaas.com
- Create your free account
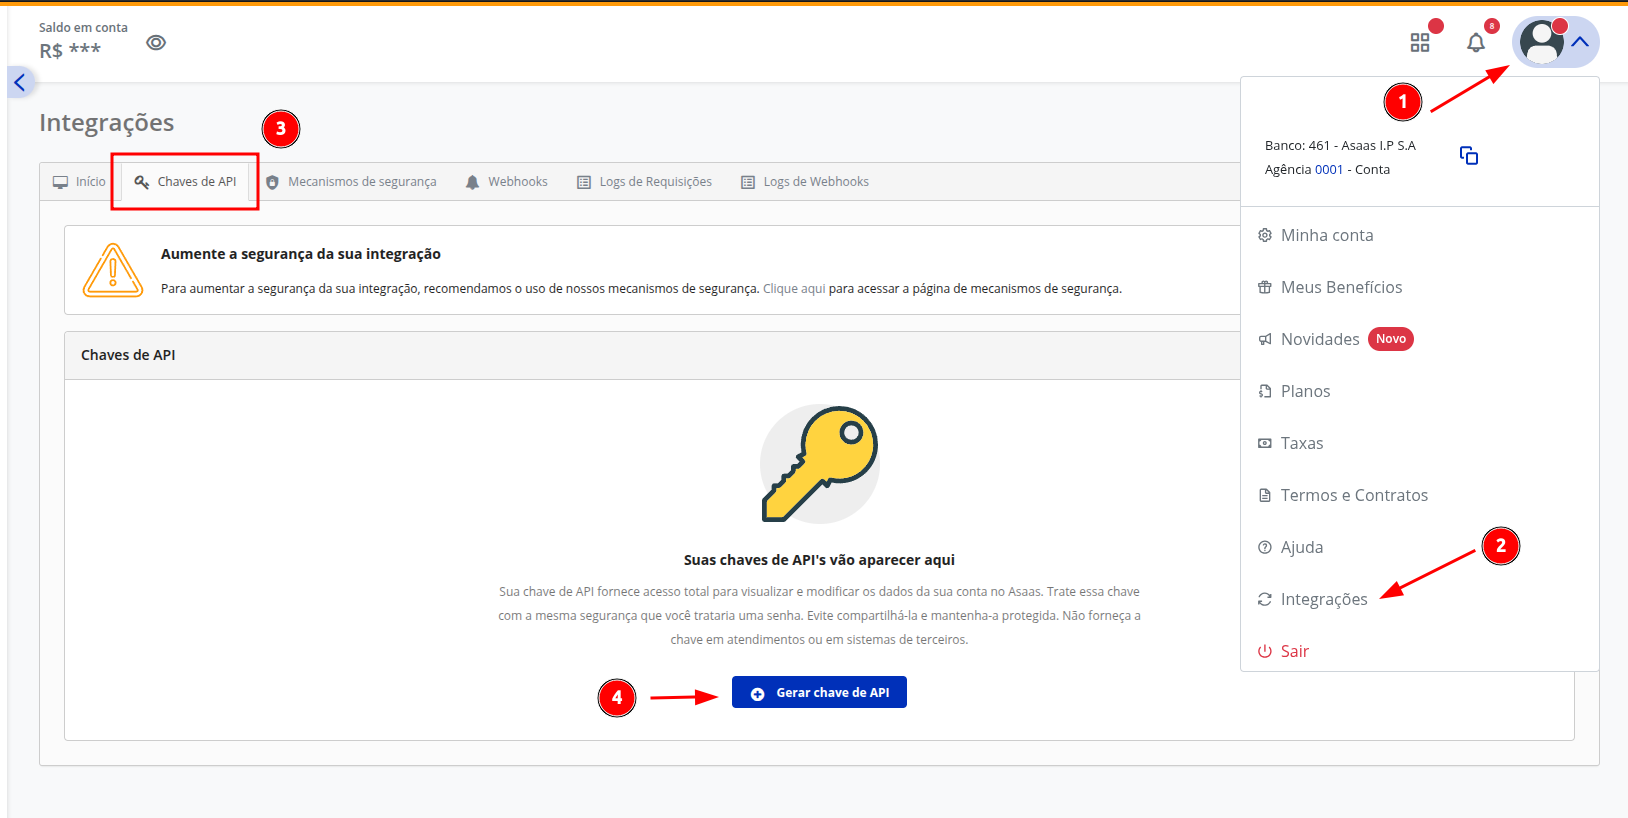
- In the menu (the menu is under the gray icon in the top-right corner of the screen), go to Integrations > API Key
- Copy your API Key
Important: API calls in the documentation only work with the sandbox key. Do not use your production key here.
🔐 Security and Best Practices:
The Sandbox key is for testing purposes only and can be used whenever you want to simulate integrations without any real impact. This will always be the key you'll use for testing! However, your production key must be stored securely and never shared publicly.
We recommend following security best practices when storing sensitive keys. Check out our article on the topic:
👉 How to securely store your API key
🔑 Step 2: Paste your key into the documentation
-
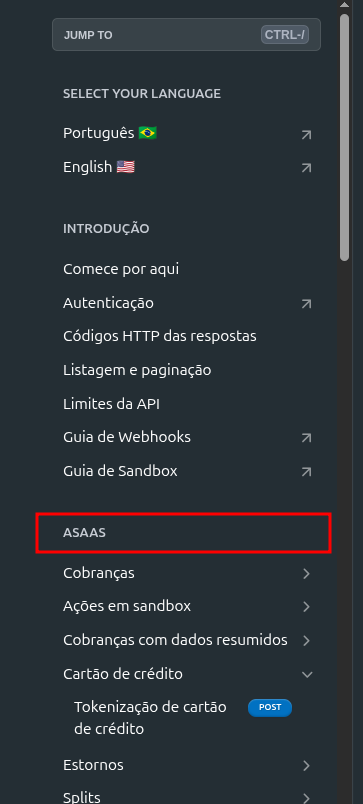
In our documentation, choose the route you want to use. On the right side under "Asaas", there are several tabs where you can select the desired route:
-
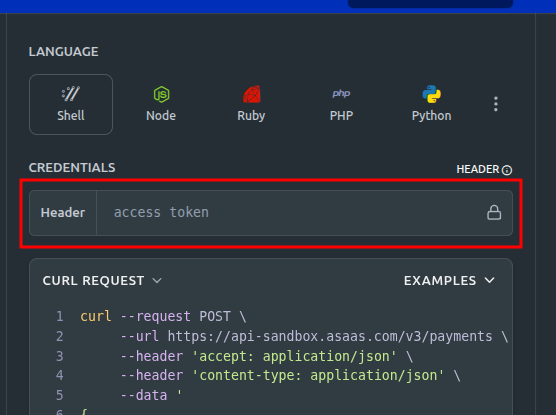
At the top of the interactive documentation, in the upper-right corner, locate the Header field and paste your API key there.
🧾 Step 3: Fill in the required parameters
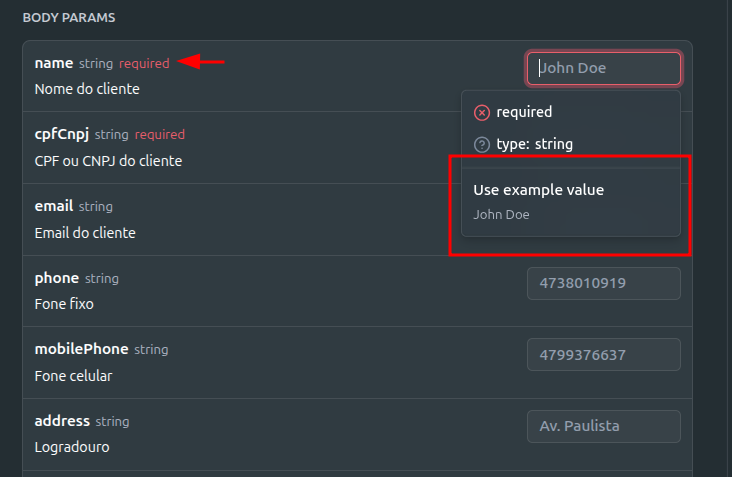
Once you choose the API call you want to test, you’ll notice that some fields are required:
- Required fields are marked with "required" next to them
- Read the descriptions beside each field to know what to fill in
- Some fields include examples to help you understand the expected format. You can use the information in these examples to fill them out, but for date fields, always use future dates (after today), and for
idfields, useidsfrom your sandbox account (e.g., theidde um cliente que você tenha criado na sua conta sandboxof a customer or charge you created in sandbox)
Tip: We recommend that you create a customer in your Asaas account before performing any other actions — this will be the starting point for your upcoming tests. After creating the customer, you can use the returned ID to generate payments, subscriptions, installments, and other available resources.
🚀 Step 4: Execute the request
- Click Try It! after filling in the details
- Check the response shown right below
The response includes:
- HTTP status (ex:
200 OK,400 Bad Request, etc) - JSON body with the resource data
❗ Common errors
- For responses other than 200 (success), check our list of HTTP status codes:
https://docs.asaas.com/reference/codigos-http-das-respostas - Errors usually come with explanatory messages, but the status code alone already helps you identify the issue when cross-checked with our documentation.
🧩 Suggested routes to start with
Want to start testing without complications? Here are some useful routes: