
Create a new Webhook through the web application
Webhooks can also be configured directly through the Asaas interface, without the need to use the API.
This option is recommended for integrations that want to configure, edit, and manage Webhooks manually through the web application.
When to use
Configuration through the web application is recommended when:
- Webhooks are created manually;
- the integration has only a few endpoints;
- it is necessary to quickly enable or disable Webhooks;
- you want to monitor and edit existing configurations;
- there is no need to automate Webhook creation through the API.
Before getting started
Before creating a Webhook, it is necessary to:
- have an active Asaas account;
- have a publicly accessible URL;
- have an application capable of receiving HTTP POST requests;
- define which events should be monitored;
- ensure that the endpoint is able to return HTTP 2xx responses.
ImportantWebhooks send notifications through HTTP POST requests. The configured endpoint must be prepared to process these calls.
You can create new Webhooks using the Asaas web application.
To do so, go to:
User menu > Integrations > Webhooks
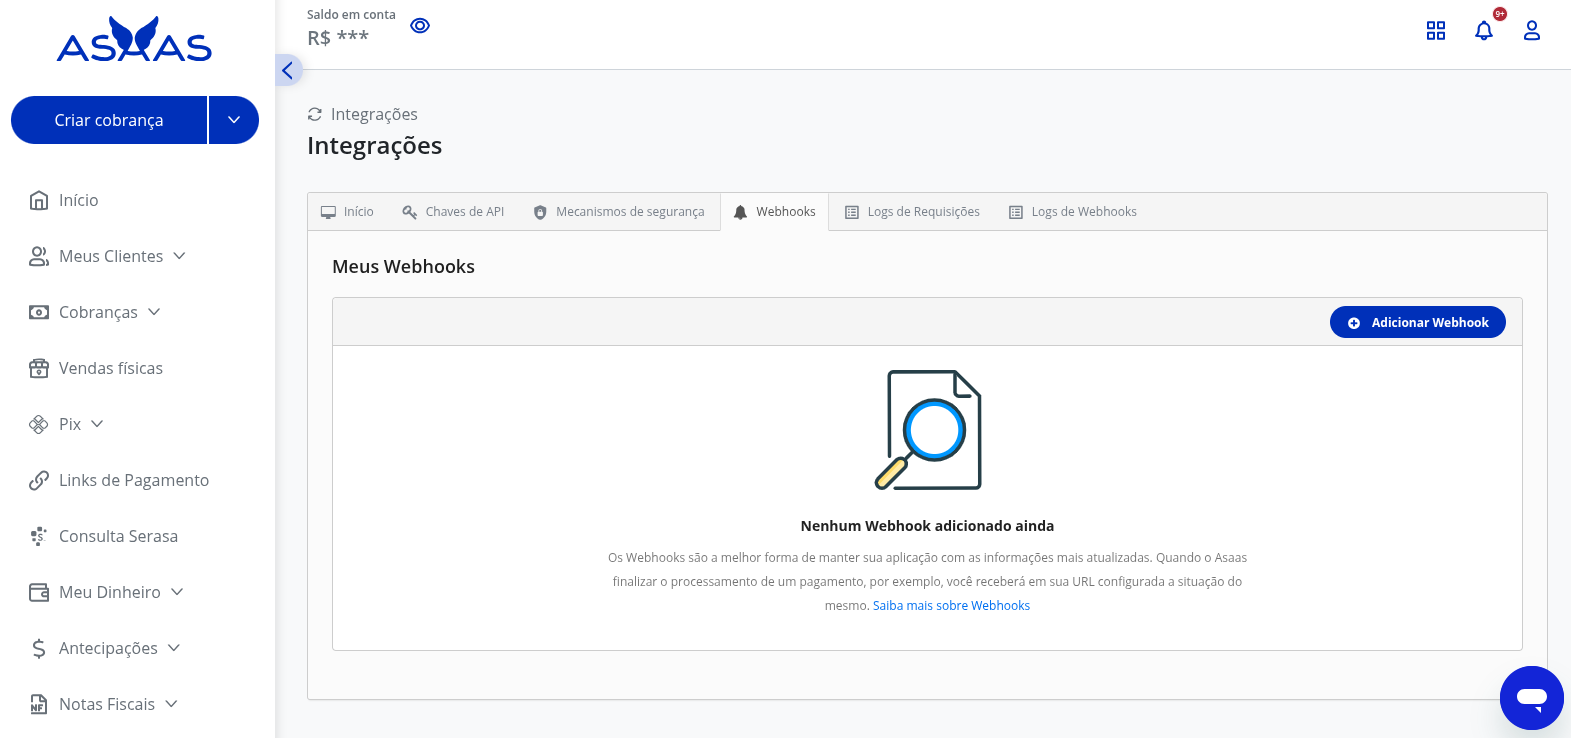
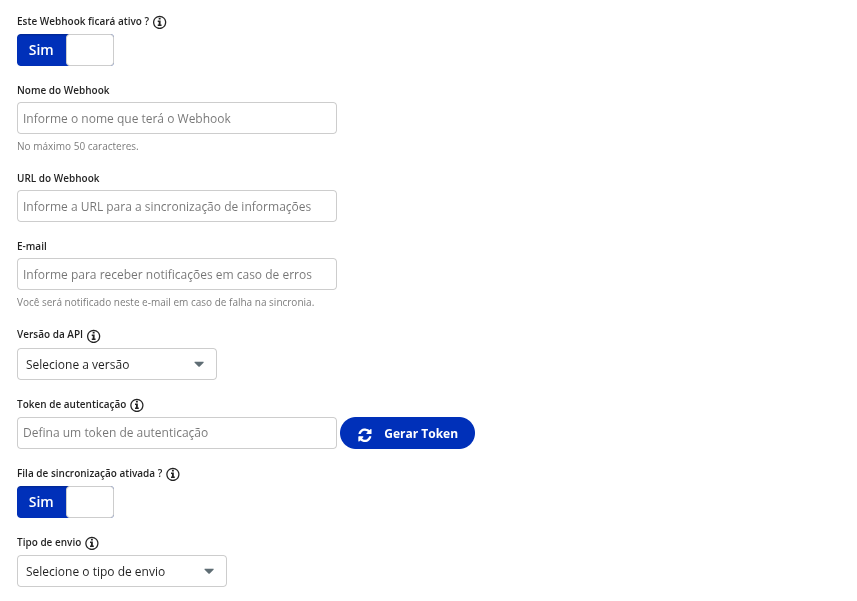
When clicking Create Webhook, a form will be displayed.
In the first step, you need to provide:
- Webhook name;
- URL responsible for receiving events;
- email address for failure notifications;
- API version;
- authentication token;
- synchronization queue status;
- Webhook status;
- delivery type.
See also the available delivery types.
Important settings
| Setting | Purpose |
|---|---|
| Name | Identifies the Webhook |
| URL | Endpoint that will receive the events |
| Receives failure notifications | |
| API Version | Defines the version being used |
| Auth Token | Allows validation of the notification origin |
| Enabled | Enables or disables the Webhook |
| Interrupted | Controls the synchronization queue |
| Send Type | Defines delivery behavior |
Secure authentication tokenThe token must:
- contain between 32 and 255 characters;
- not contain blank spaces;
- avoid simple sequences;
- not use an Asaas API Key.
The Generate token button automatically creates a secure value.
Event selection
After configuring the Webhook, select which events should generate notifications.
You can receive events related to:
- payments;
- subscriptions;
- Pix;
- transfers;
- invoices;
- Checkout;
- internal movements;
- and many other resources.
See the complete event list.

Workflow
After configuration, the default behavior is:
An event occurs in the account
↓
Asaas identifies configured Webhooks
↓
Notification is sent to the URL
↓
Application processes the event
↓
Endpoint returns success
↓
Event is considered delivered
Notification example
Notifications are sent through HTTP POST requests.
Example:
{
  "event": "PAYMENT_RECEIVED",
  "payment": {
    "id": "pay_080225913252",
    "status": "RECEIVED",
    "value": 150.00
  }
}
ImportantThe structure of the object sent varies according to the configured event.
Important rules
- You can have up to 10 Webhooks per account.
- Each Webhook can monitor different events.
- Events are sent through POST requests.
- The delivery model is at least once, therefore the same event may be sent more than once.
- Implementing idempotency is recommended to avoid duplicate processing.
- Events remain stored for up to 14 days.
- After 15 consecutive failures, the queue may be interrupted.
Expected application response
For delivery to be considered successful, the application must return an HTTP 2xx response.
Examples:
HTTP/1.1 200 OKor
HTTP/1.1 204 No ContentResponses outside this range may trigger new delivery attempts.
Important behaviors
When using Webhooks, consider that:
- event delivery is asynchronous;
- events may be resent in case of failure;
- consecutive failures may interrupt the queue;
- pending events remain stored for up to 14 days;
- after queue reactivation, events are resent in chronological order;
- the endpoint should respond quickly to avoid timeouts.
Best practices
- Configure only the necessary events.
- Use a strong authentication token.
- Implement idempotency.
- Process events asynchronously.
- Monitor Webhook logs.
- Avoid lengthy processing before responding to Asaas.
- Return HTTP 2xx responses as quickly as possible.
Operational impacts
An active Webhook can automatically synchronize information between systems.
Endpoint failures may cause:
- increased delivery attempts;
- queue penalties;
- synchronization interruption;
- permanent event loss after 14 days.
For this reason, continuous monitoring of the integration is recommended.
You may have up to 10 Webhooks configured per account, with no URL restrictions.
It is also possible to edit or remove existing Webhooks.

Next steps
After creating the Webhook, we recommend reviewing:
- Receive events from Asaas in your Webhook endpoint;
- How to implement idempotency in Webhooks;
- Delivery types;
- Webhook events;
- Webhook logs;
- Queue penalties;
- Paused queue.
Updated about 1 month ago