
Redirection after payment
Redirect the customer back to your application after a successful payment on our invoice
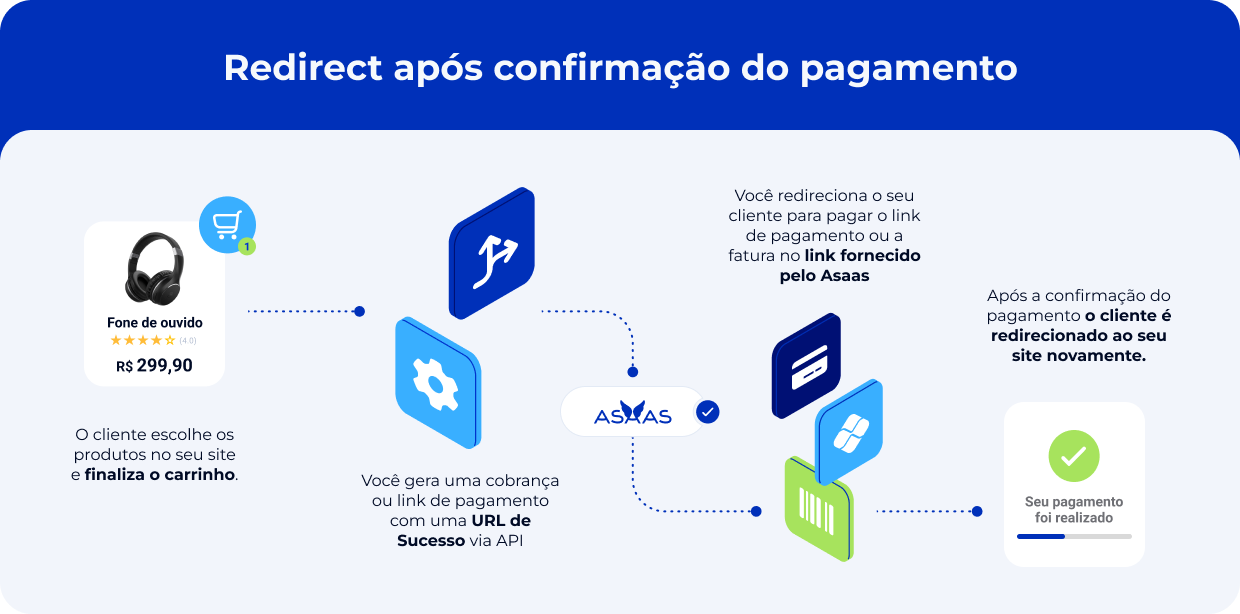
Configure a return URL to direct the customer to your website after they complete the payment in the Asaas interface.
This feature can be used in payments, Payment Links, and subscriptions.
ImportantBy the end of this guide, you will have configured the automatic return or provided a button for the customer to go back to your website.
When to use
Use the return URL when:
- the payment is completed on a page hosted by Asaas;
- the customer needs to go back to your website or app;
- your integration uses the Invoice or a Payment Link;
- you want to direct the customer to a confirmation page or to continue their journey.
Before you start
Define:
- the page the customer will be directed to;
- whether the return will be automatic;
- how your application will confirm the payment;
- which Webhooks will be used.
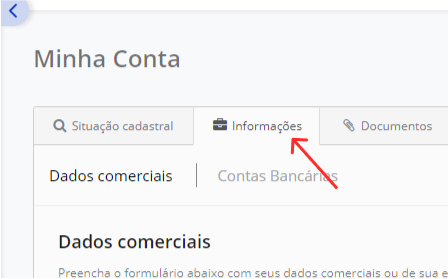
The URL must belong to the same domain registered in the account's business information, available at:
Account settings → Information
How it works
%%{init: {"flowchart": {"nodeSpacing": 18,"rankSpacing": 24,"diagramPadding": 4,"padding": 7}}}%%
flowchart TD
    A["Create a payment, subscription, or Payment Link"] --> B["Provide the callback object"]
    B --> C["Direct the customer to the Asaas page"]
    C --> D["Customer completes the payment"]
    D --> E{"Is autoRedirect enabled?"}

    E --> ESim(("Yes"))
    E --> ENao(("No"))

    ESim --> F["Automatically redirect to successUrl"]
    ENao --> G["Display the button: Go to website"]

    F --> H["Customer returns to your website"]
    G --> H

    classDef inicio fill:#DBEAFE,stroke:#2563EB,color:#1E3A8A,stroke-width:3px
    classDef decisao fill:#FEF3C7,stroke:#D97706,color:#78350F,stroke-width:3px
    classDef validacao fill:#E0F2FE,stroke:#0284C7,color:#0C4A6E,stroke-width:2px
    classDef sucesso fill:#DCFCE7,stroke:#16A34A,color:#14532D,stroke-width:3px

    classDef respostaSim fill:#22C55E,stroke:#15803D,color:#FFFFFF,stroke-width:3px
    classDef respostaNao fill:#EF4444,stroke:#B91C1C,color:#FFFFFF,stroke-width:3px

    class A inicio
    class E decisao
    class B,C,D,F,G validacao
    class H sucesso

    class ESim respostaSim
    class ENao respostaNao

    linkStyle default stroke:#94A3B8,stroke-width:2px
    linkStyle 4 stroke:#22C55E,stroke-width:4px
    linkStyle 5 stroke:#EF4444,stroke-width:4px
Choose the return type
Configure the behavior in the callback object:
| Field | Purpose |
|---|---|
successUrl | URL the customer will be directed to |
autoRedirect | Defines whether the return will be automatic |
autoRedirect | Behavior |
|---|---|
true | The customer is redirected automatically |
false | The Go to website button is displayed after payment |
Automatic redirection applies to payment methods with immediate confirmation, such as Pix, credit card, and debit card through the Invoice.
1. Configure a payment
Send the callback object when creating the payment:
POST /v3/payments{
"customer": "cus_000005219613",
"billingType": "PIX",
"value": 2000.00,
"dueDate": "2027-01-15",
"callback": {
"successUrl": "https://seusite.com/redirect",
"autoRedirect": true
}
}See the endpoint: Create new payment.
Expected result
The API will return the invoiceUrl field.
Direct the customer to this URL. After the payment is confirmed, they will be forwarded to the address provided in successUrl.

If autoRedirect is false, the return will depend on the customer clicking the Go to website button.
Update a payment
To add or change the redirection of an existing payment, send the callback object in:
PUT /v3/payments/{id}See the endpoint: Update existing payment.
2. Configure a Payment Link
Send the same object when creating the Payment Link:
POST /v3/paymentLinks{
"name": "My Payment Link",
"billingType": "UNDEFINED",
"value": 2000.00,
"chargeType": "DETACHED",
"callback": {
"successUrl": "https://seusite.com/redirect",
"autoRedirect": false
}
}See the endpoint: Create a Payment Link.
Expected result
The API will return the url field.
Direct the customer to this address. After payment, they will be redirected automatically or will see the return button, depending on the chosen configuration.

To change the configuration later, use:
PUT /v3/paymentLinks/{id}See the endpoint: Update a Payment Link.
Configure in subscriptions
The callback object can also be sent when creating a subscription.
See the endpoint: Create new subscription.
The return will be applied to the payment pages of the payments generated by the subscription, according to the payment method used.
Later access to the Invoice
After the payment is completed, accessing the invoiceUrl again will usually display only the paid Invoice, without repeating the redirection.
To request the redirection when accessing the Invoice again, add:
?autoRedirect=trueExample:
https://www.asaas.com/i/IDENTIFIER?autoRedirect=trueConfirm the payment via Webhook
AttentionRedirection is meant to control the customer's navigation. It must not be used as payment confirmation.
Confirm the result through the payment status or Webhook events.
See:
Common errors
If the redirection does not work, check whether:
successUrlbelongs to the domain registered in the account;- the
callbackobject was sent correctly; autoRedirecthas a boolean value;- the payment method allows immediate confirmation;
- the payment was actually confirmed;
- the payment or Payment Link was successfully updated.
Next steps
Updated 18 days ago