
Receive events from Asaas in your Webhook endpoint
Set up a webhook URL to keep your application always up-to-date with API integration
Follow this tutorial to create your first Webhook.
The event object
Events are JSON objects sent through Asaas Webhooks. They are responsible for notifying you whenever an event occurs in your account.
Through them, you will have access to the id, the event attribute, which indicates which event occurred, and the related entity object. In the example below, we have the payment object containing the payment data.
{
   "id": "evt_05b708f961d739ea7eba7e4db318f621&368604920",
   "event":"PAYMENT_RECEIVED",
   "dateCreated": "2024-06-12 16:45:03",
   "payment":{
      "object":"payment",
      "id":"pay_080225913252"
   }
}
Webhooks are the mechanism used to automatically receive notifications whenever an event occurs in your account.
Event types
Events are divided into categories related to Asaas entities.
See the Webhook Events page to view all available events.
Start here
To start receiving events through Webhooks:
- Access the Sandbox environment;
- Create an endpoint capable of receiving HTTP POST requests;
- Configure the Webhook through the web application or via API;
- Test your integration;
- Debug it in case of failures;
- After validating everything in Sandbox, replicate the configuration in Production;
- Implement security measures.
Create an endpoint
Create an endpoint that receives HTTP POST requests containing an event object.
It is recommended to respond as quickly as possible with HTTP 200 to avoid issues with the synchronization queue.
Node.js example
const express = require('express');

const app = express();

app.post(
  '/payments-webhook',
  express.json({ type: 'application/json' }),
  (request, response) => {

    const body = request.body;
    const payment = body.payment;

    switch (body.event) {

      case 'PAYMENT_CREATED':
        createPayment(payment);
        break;

      case 'PAYMENT_RECEIVED':
        receivePayment(payment);
        break;

      default:
        console.log(`Unhandled event: ${body.event}`);
    }

    return response.json({
      received: true
    });
  }
);

app.listen(8000, () => {
  console.log('Running on port 8000');
});
PHP example
<?php

use Illuminate\Http\Request;
use Illuminate\Support\Facades\Log;

Route::post('/payments-webhook', function (Request $request) {
    $body = $request->all();

    switch ($body['event']) {
        case 'PAYMENT_CREATED':
            createPayment($body['payment']);
            break;

        case 'PAYMENT_RECEIVED':
            receivePayment($body['payment']);
            break;

        default:
            Log::info('Unhandled event: ' . $body['event']);
    }

    return response()->json(['received' => true]);
});
Java example
@RestController
@RequestMapping("/payments-webhook")
public class WebhookController {

    @PostMapping(consumes = "application/json")
    public ResponseEntity<Map<String, Boolean>> handleWebhook(@RequestBody Map<String, Object> body) {

        String event = (String) body.get("event");
        Map<String, Object> payment = (Map<String, Object>) body.get("payment");

        switch (event) {

            case "PAYMENT_CREATED":
                createPayment(payment);
                break;

            case "PAYMENT_RECEIVED":
                receivePayment(payment);
                break;

            default:
                System.out.println("Unhandled event " + event);
        }

        return ResponseEntity.ok(Map.of("received", true));
    }
}
Python example
from flask import Flask, request, jsonify

app = Flask(__name__)

@app.route('/payments-webhook', methods=['POST'])
def payments_webhook():

    body = request.json

    if body['event'] == 'PAYMENT_CREATED':
        create_payment(body['payment'])

    elif body['event'] == 'PAYMENT_RECEIVED':
        receive_payment(body['payment'])

    return jsonify({'received': True})
Important behaviors
"At least once" delivery model
Asaas Webhooks use the at least once delivery model.
This means that the same event may be sent more than once.
For this reason, implementing idempotency is recommended.
Retry on failure
If the application does not respond with an HTTP 2xx status code, new delivery attempts will be performed.
After 15 consecutive failures, the queue may be interrupted.
Asynchronous processing
It is recommended to respond quickly to Asaas and process events internally.
Recommended flow:
Receive event
↓
Persist in queue
↓
Return HTTP 200
↓
Process business rules
Event ordering
When a paused queue is reactivated, pending events are resent in chronological order.
Configure your Webhook
You can configure Webhooks:
- through the web application;
- through the API.
It is recommended to perform your first tests in Sandbox.
Guides:
Test your Webhook
If your application is running locally, you can expose it using tools such as:
- ngrok;
- Cloudflare Tunnel.
These tools generate a public URL that can be configured in the Webhook.
Debugging Webhook integrations
You can monitor deliveries through the Webhook Logs page.
Access:
User Menu > Integrations > Webhook Logs
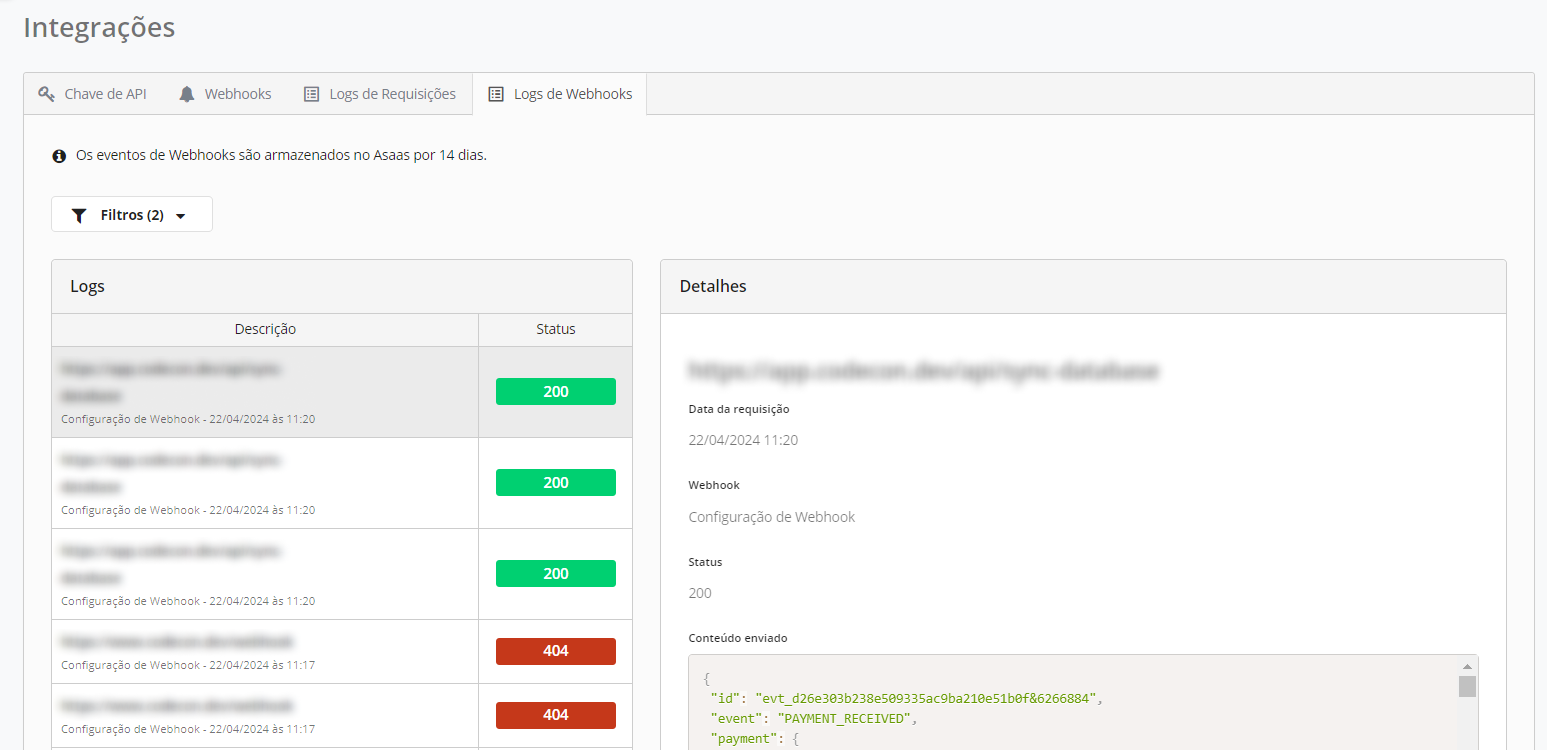
On this page, you can view:
- the payload sent;
- the time of the attempt;
- the HTTP status code returned by the server;
- the number of attempts;
- communication errors.
These logs are especially useful when there are synchronization problems or paused queues.
Common errors
Endpoint timeout
Long-running processing may generate new delivery attempts.
It is recommended to respond quickly and process data in the background.
HTTP 500
Internal application failures prevent delivery confirmation.
Check the Webhook Logs to identify the cause.
Duplicate event
Since delivery follows the "at least once" model, the same event may arrive more than once.
Implement idempotency using the event identifier.
Invalid token
If you use an authentication token, always validate the following header:
asaas-access-tokenKeep your Webhook secure
It is highly recommended to protect your endpoints.
Allow only Asaas IPs
Configure your firewall to accept requests only from the official Asaas IPs.
Use an authToken
Configure a token and always validate the following header:
asaas-access-token
Defining a secure tokenThe token must:
- contain between 32 and 255 characters;
- not contain blank spaces;
- not use simple sequences;
- not be an Asaas API Key.
Operational impacts
Endpoint failures may cause:
- new delivery attempts;
- increased request volume;
- queue interruption after consecutive failures;
- permanent event loss after 14 days;
- inconsistencies between systems if idempotency is not implemented.
For this reason, it is recommended to:
- continuously monitor Webhook Logs;
- respond quickly to Asaas;
- process events asynchronously;
- implement idempotency;
- initially test in Sandbox.
Next steps
After receiving your first events, we recommend reviewing:
- How to implement idempotency in Webhooks;
- Delivery types;
- Webhook events;
- Webhook logs;
- Queue penalties;
- Paused queue;
- Official Asaas IPs.
Updated 25 days ago