Initial Settings

Enabling Payment Methods

With the Asaas Plugin, WooCommerce, and Brazilian Market on WooCommerce installed on your site, your store is ready to be configured.

From there, you can activate the payment methods you want to offer.

To do this, go to WooCommerce > Settings. On the Payments tab, you’ll find all the available payment methods and can enable them as needed.

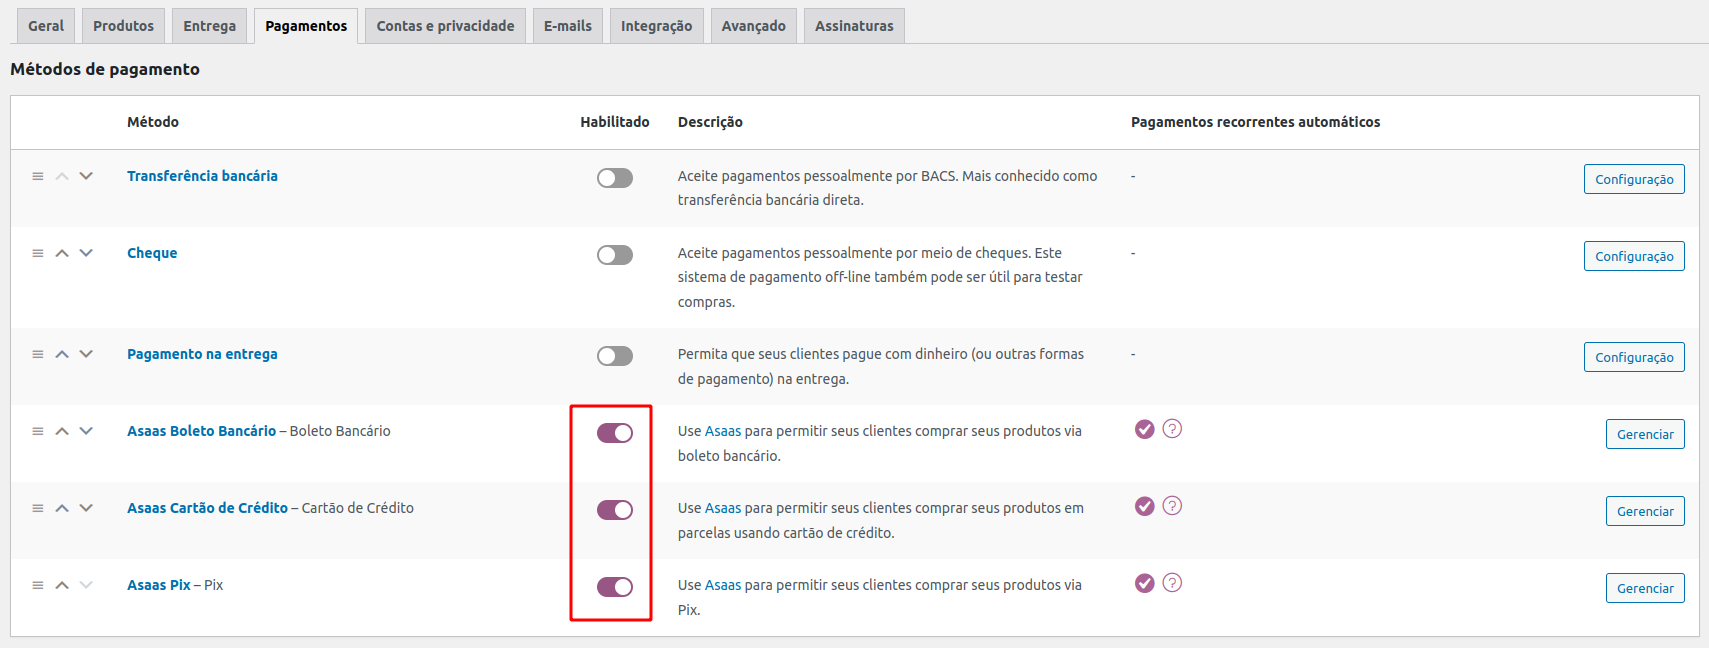
Each payment method has its own settings, which can be enabled, disabled, or configured independently.


Environments and API Key

Before configuring payment methods, you must connect your WordPress store with your Asaas account.

If you want to test the integration first, you can create an account in the Asaas Sandbox (Development Environment) at https://sandbox.asaas.com.

The production environment is available at https://www.asaas.com/.

⚠️ Note that while the Sandbox environment is identical to the production environment, each has its own credentials and API Key.

To generate your API Key:

  1. Log in to your Asaas account (in the environment of your choice).
  2. In the user menu, go to Integrations.
  3. Click Generate new API Key.
  4. Copy the full API Key value.

Then, in your WordPress admin, go to the WooCommerce Payments settings and open any Asaas payment method configuration page. Scroll to the API section:

  • Environment: Select the environment you want to connect to your store. Choose Sandbox if you’re testing with a Sandbox key, or Production for live use.
  • API Key: Paste the entire key value you copied, including special characters.

Once you provide the environment and API Key, the system will validate the information.

  • If valid, you’ll see: “✅ Valid API Key.”
  • If invalid, check whether the correct environment was selected and whether the key was generated in the right environment.

After validation, save the changes.

❗️

Important: Your API Key grants significant privileges. Keep it safe, never share it in support tickets, and store it securely.


Webhook Configuration

The webhook keeps your store orders updated with the payment statuses from Asaas.

As of version 2.5 of the Asaas Plugin, webhook setup is fully automatic. Once you provide your API Key and save, the plugin automatically configures the webhook queue in your Asaas account.

📘 The API and Webhook configuration is shared across all payment methods, so you don’t need to configure it separately for each one.


Configuring Boleto Bancário

Within Boleto Bancário payment settings, you’ll find:

  • Enable/Disable – Make Boleto Bancário available at checkout.
  • Title – The display name of the method at checkout.
  • Description – Information shown under the title at checkout.
  • Installments – Define the maximum number of installments (0–60).
  • Interest per Installment – Set installment interest rates.
  • Minimum Installment Value – Define the minimum allowed value per installment.
  • Validity Days – Number of days until the boleto expires.
  • Retention Period – How long the boleto remains in Asaas after expiration.
  • Split – Configure payment splits with partners (WooCommerce Asaas Plugin v2.2.0+).
  • Notifications – Allow Asaas to send email/SMS reminders until payment is made.
  • API – If already configured in the API/Webhook section, no further action needed.

Configuring Pix

Within Pix payment settings:

  • Enable/Disable – Enable Pix payments.
  • Title – Display name of the method at checkout.
  • Description – Info shown under the title at checkout.
  • Validity Days – Number of days Pix remains valid after purchase.
  • Copy and Paste – Enable to show Pix Copy & Paste code; disable to show only QR Code.
  • Split – Configure revenue splits (Plugin v2.2.0+).
  • Notifications – Allow Asaas to notify customers via email/SMS.
  • API – Already covered under the API/Webhook setup.

Configuring Credit Card

Within Credit Card payment settings:

  • Enable/Disable – Enable credit card payments.
  • Title – Display name of the method at checkout.
  • Description – Info shown under the title at checkout.
  • Minimum Order Total – Minimum order amount for credit card availability.
  • Installments – Define maximum installments (0–12).
  • Interest per Installment – Set interest for each installment option.
  • Minimum Installment Value – Define the minimum allowed value per installment.
  • Split – Configure revenue splits (Plugin v2.2.0+).
  • Notifications – Enable Asaas notifications to customers.
  • API – Already covered under the API/Webhook setup.

Subscriptions

If your store uses the WooCommerce Subscriptions plugin, you can pair it with Asaas to manage recurring billing for boleto and credit card payments.

Asaas supports the following billing cycles: MONTHLY, BIWEEKLY, BIMONTHLY, QUARTERLY, SEMIANNUAL, ANNUAL.

You can also configure trial periods and signup fees. Subscription orders are linked as “child orders” and visible in the subscription management panel.

A subscription end date can also be defined, which will be sent to Asaas to automatically stop billing.


Split Payments

With Asaas for WooCommerce (v2.2.0+), you can use Split Payments to share revenue with partners or affiliates.

Currently, you can configure percentage-based splits separately for credit card, boleto, and Pix.

Steps:

  1. Obtain the partner’s Wallet ID from their Asaas account.
  2. In WordPress, go to Plugins > Manage Split Wallets under the Asaas Plugin.
  3. Add the wallet, give it a name, and save.
  4. Go to WooCommerce > Settings > Payments, choose the desired payment method, and open the Split section.
  5. Assign the wallet and define its percentage share (up to 100% total).
  6. Save changes.

❗️

Important Notes

  • Subscriptions are not yet compatible with split payments (under development).
  • Splits are not shared across payment methods—you must configure them separately for Pix, Boleto, and Credit Card.

Possible Errors:

  • If total split percentage exceeds 100%, you’ll see:
    Split: The sum of wallets cannot exceed 100%.
  • If an invalid wallet is entered, an error will be displayed.