
Bank slip - Shopify
Using Asaas Bank Slip with Shopify
By using the Asaas Bank Slip App in your Shopify store, you guarantee a series of benefits and advantages for your online store.
Unlike many institutions, Asaas confirms and settles bank slips on the same business day as the payment, according to the time the bank slip is paid.
For example: if your customer pays at 09:00 in the morning on a business day, in about one hour you will already have the payment confirmation in your Shopify store and also in your Asaas account. This allows your product or service to be released more quickly to the end customer.
The amount is also credited on the same day, usually by 16:00.
For payments made after 15:00, on holidays, or on weekends, the deadline remains the standard banking confirmation and settlement period of up to 1 business day.
In addition, among other advantages of using the Asaas Bank Slip App on Shopify, we can highlight:
- easy integration, done in just a few clicks;
- transparent purchase experience;
- possibility of paying with Pix directly through the invoice;
- support for refunds and reversals via Asaas.
AttentionIf you want to make the Pix option available on the Asaas invoice in your Shopify store, it is essential to generate a Pix key in your Asaas account to speed up the receivables flow, through the Pix > My Keys menu.
If you do not have registered Pix keys, charge settlement may occur late, impacting order confirmation on Shopify.
How to install the Asaas Bank Slip App on Shopify?
Installing the Asaas Bank Slip App is simple.
First, access the app link, located here.
As our release with Shopify is recent, you will not yet be able to find the app directly through the payment providers, so it is necessary to open it through the link informed above. Soon, we will be available in the official listing.
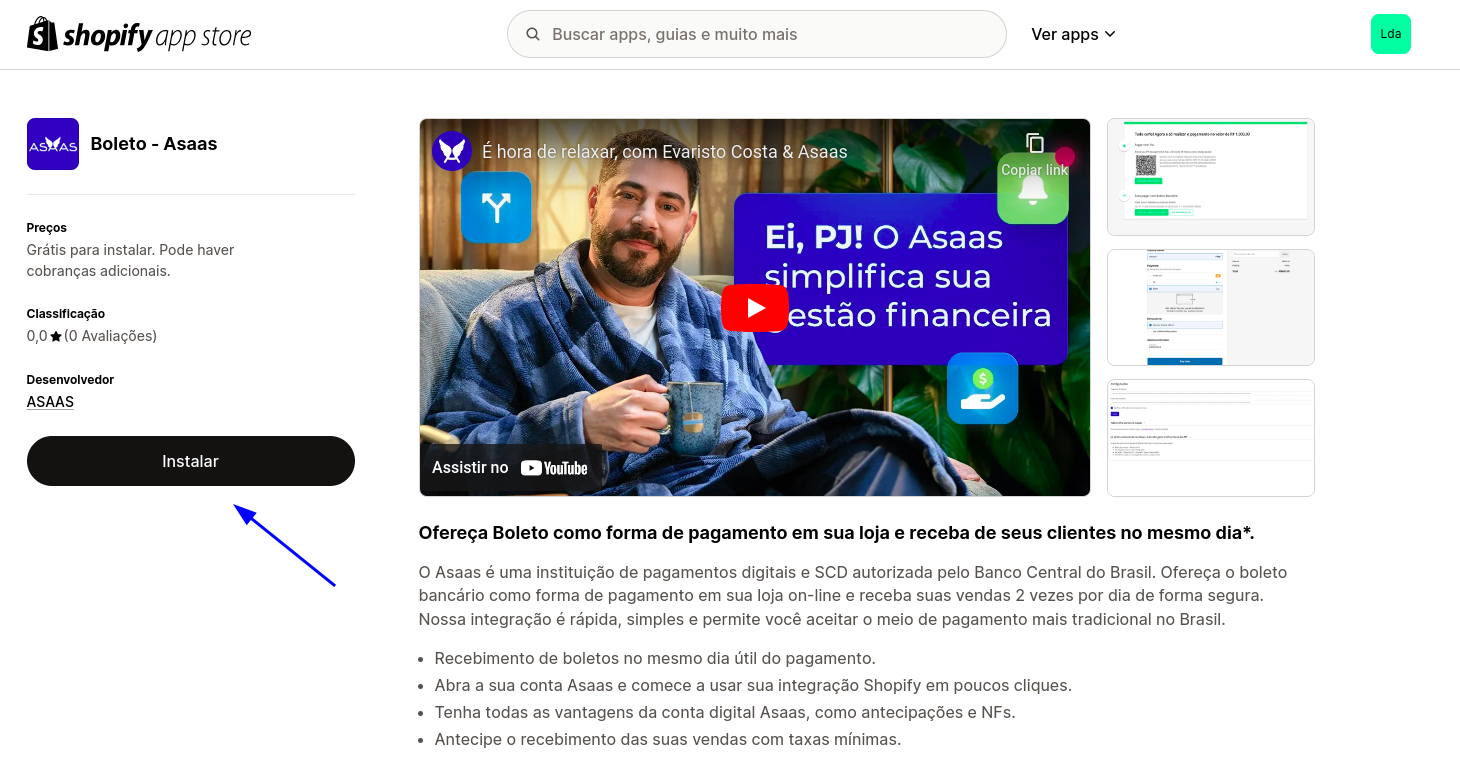
If you are already logged in to your store, click the "Install" button on the left side to continue with the installation process.
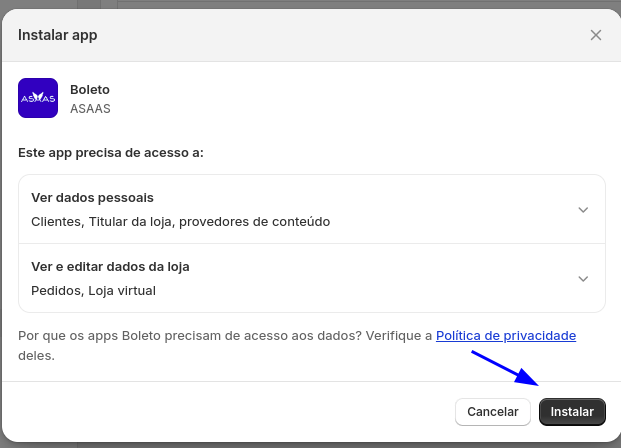
On the next screen, you will see the permissions that the Asaas Bank Slip App needs to work correctly. If you agree, click "Install" again.
The next step will be to enter your Asaas API key.
On this screen, you will have the option to enter your Production API key (for real transactions) and your Sandbox API key (for testing and homologation).
To obtain your Production API key, access the integrations area in the web interface, through the website https://www.asaas.com.
If you want to test in Sandbox, first create your Sandbox account through the website https://sandbox.asaas.com. The path to generate the key will also be in the integrations area of your Sandbox account.
Each installed app will need an individual key. So, when creating the key, to make identification easier, we suggest entering something like "Shopify Bank Slip API Key".
Once your key has been generated, copy it and enter it in the respective field related to the desired environment.
Attention
- It will be mandatory to enter a Production API key.
- The Sandbox API key is optional. Enter it only if you want to test your store before putting it into Production.
- If you enter both keys, in the next step you will be able to determine whether you want to use the Production environment or the Sandbox environment.
- The API key will be viewed only once, at the time of creation. Store your keys securely, as they authenticate actions in your Asaas account.
- If the key is lost, it will be necessary to generate a new key, as it is not possible to recover keys that have already been created.
In the Minimum due date field, define the due date period that the bank slip will have after the charge is created.
When the bank slip reaches the defined due date, the charge and the order will be automatically canceled to restore stock, if this setting is defined in the product.
In the Enable Asaas charge notifications flag, you can choose to use Asaas notifications to charge the customer or keep this option disabled if you do not want to use our messaging system.
Once everything is configured, click "Save".
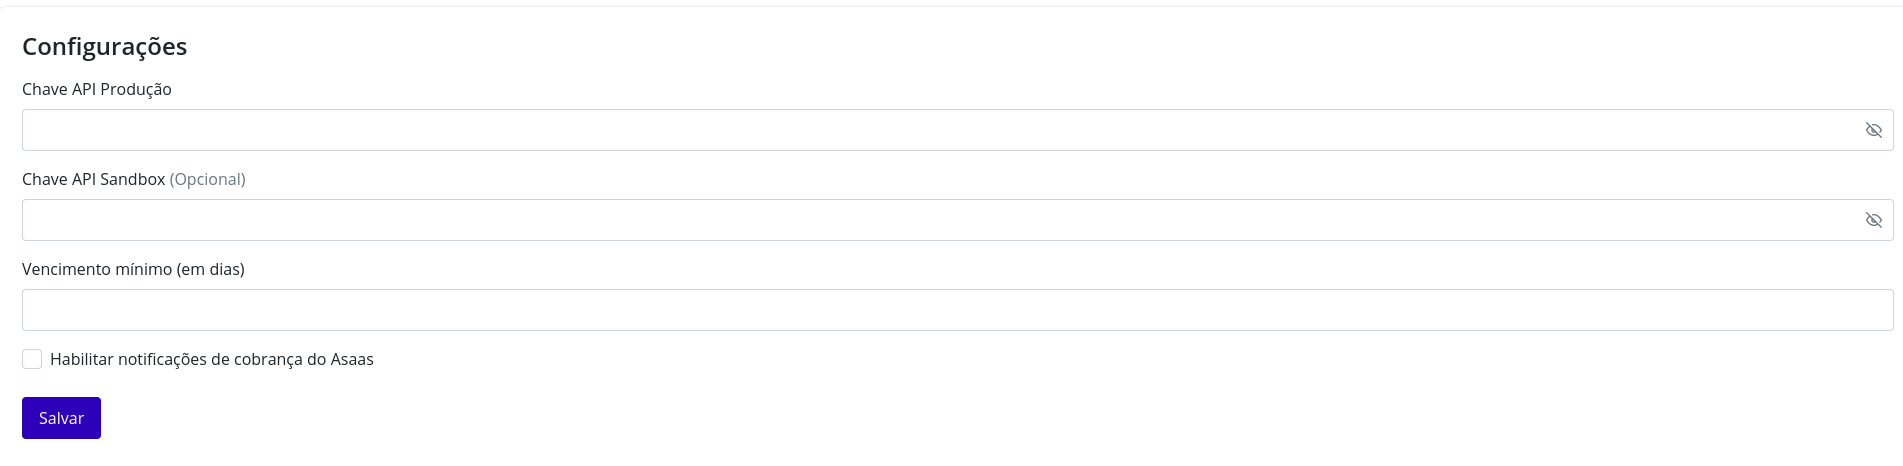
If everything has been entered correctly, your settings will be saved. If any error is displayed, check whether the API keys were entered correctly in the fields corresponding to each environment.
Finally, on the next screen, you will be able to activate the Asaas Bank Slip App and define whether it will be in test mode, with the Sandbox environment, or in real mode, with the Production environment. To define this, enable or disable the Test mode flag.
After confirming your preferences, click "Save".
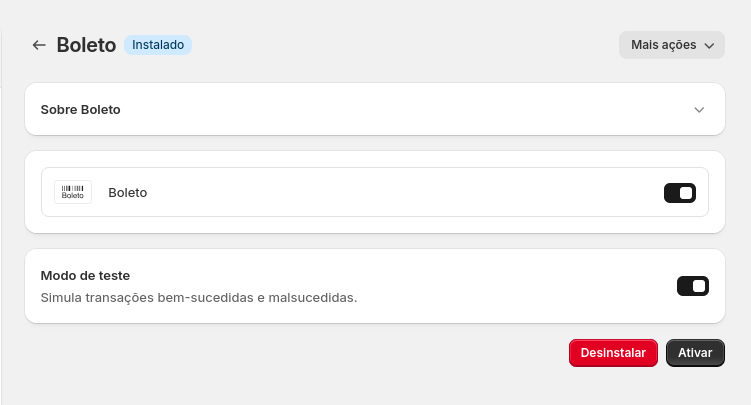
And that’s it! The Asaas Bank Slip App will be installed and ready to operate bank slip transactions with Asaas.
Purchase experience
When your customer makes a purchase at the Shopify checkout, they will be able to select the desired payment method. With the Asaas Bank Slip App, the Bank Slip option will be available, in addition to the other payment methods activated by the merchant.
After filling in the data and selecting the Bank Slip payment method, when your customer clicks "Pay now", they will be redirected to the Asaas invoice screen, where they can obtain the payment details.
The screen will be similar to this:
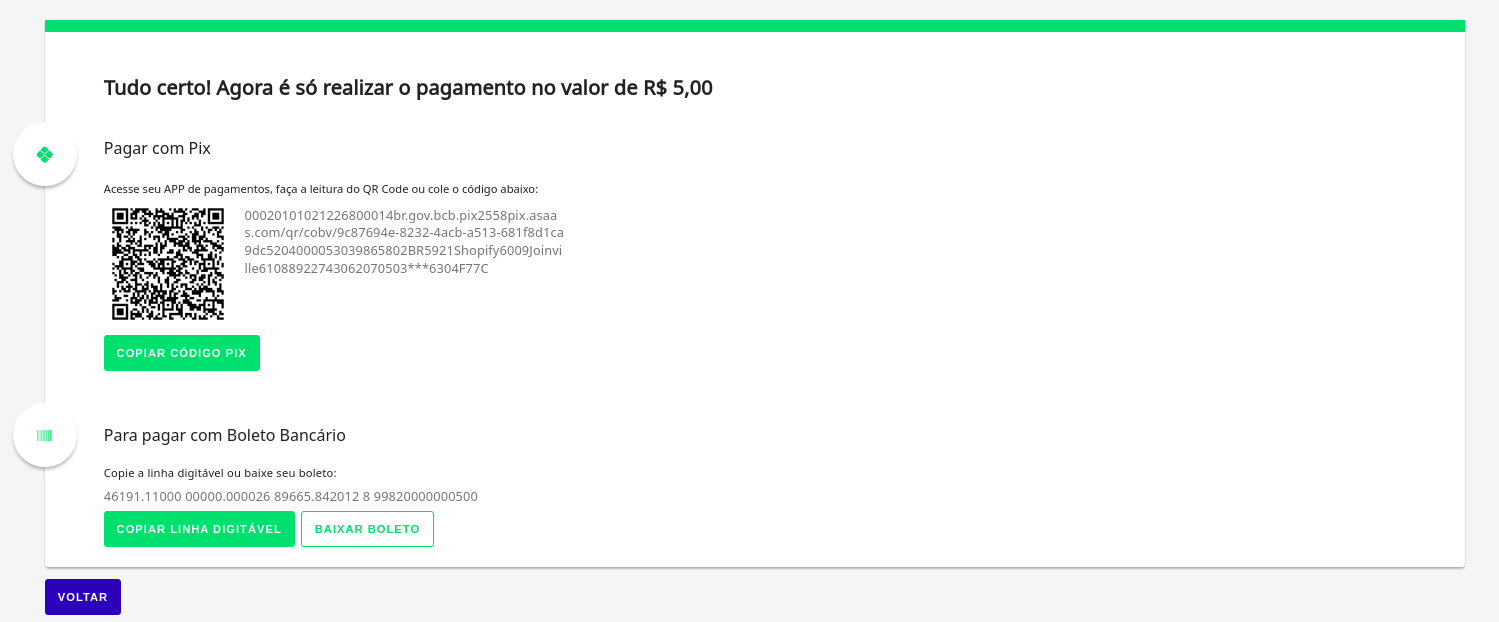
At the top, we will also provide the customer with the option to pay by Pix, if they choose to pay and have the product or service released instantly. Once paid, we will automatically redirect the customer to the purchase thank-you screen within Shopify.
If they choose to pay by Bank Slip, at the bottom they will find the button to copy the payment line for payment via Internet Banking or to download the bank slip.
The "Back" button allows the customer to return to the checkout screen, if they want to add a new product or change the selected payment method.
If the customer copies the payment line or clicks "Download bank slip", the "I have already paid" button will be displayed, allowing them to be directed to the store’s thank-you screen.
Updated 3 months ago