
Initial settings
After installing the Asaas module in Magento, it is necessary to perform some configurations to enable payment methods and define the behavior of the charges generated by the integration.
These settings determine how Pix, bank slips and credit cards will be presented to buyers and directly influence the purchasing experience and the financial flow of the operation.
When to perform these configurations
This step must be performed after installing the Asaas module.
It is recommended for stores that want to:
- enable Pix, bank slips and credit cards;
- configure installments and interest rates;
- define the expiration period of charges;
- control notifications sent to buyers;
- automatically synchronize orders between Magento and Asaas.
Requirements
Before proceeding, it is necessary that:
- the Asaas module has already been installed;
- the Asaas account is active;
- the API Key is available;
- Magento is operating normally;
- the necessary permissions for store administration are available.
ImportantThe settings described on this page will only work after the module has been correctly installed.
Important behaviors
The settings performed at this stage directly influence how the integration works.
Among the main behaviors are:
- automatic order updates through Webhooks;
- charge generation in the configured Asaas account;
- bank slip expiration control;
- Pix expiration control;
- credit card installments with configurable interest rates;
- optional notifications sent to buyers.
Important parameters
| Setting | Purpose |
|---|---|
| API Key | Credential used to authenticate the integration |
| Environment | Defines whether the operation will use Production or Development |
| Webhook URL | Responsible for automatic order updates |
| Installments | Defines the maximum number of installments and interest rates |
| Bank slip expiration period | Defines the charge due date |
| Pix expiration period | Defines how long the QR Code will remain available |
| Notifications | Allows sending emails to buyers |
Integration flow example
Order created in Magento
↓
Charge created in Asaas
↓
Customer makes the payment
↓
Webhook sent by Asaas
↓
Magento updates the order status
Operational impacts
The settings performed at this stage directly impact:
- the buyer's experience;
- checkout behavior;
- charge expiration periods;
- the financial reconciliation of the operation;
- automatic order updates.
Incorrect changes may cause discrepancies between the payment and the order in Magento.
When accessing the Magento administrative panel, in the side menu click on Stores, then click on Configuration, then click on Customers, then Customer Configuration, and then access the Name and Address Options.
In Number of Lines in a Street Address, you must enter the value 4, as shown in the image below:

Then, access the Stores menu again, click on Configuration, and under the Sales submenu click on Payment Methods. The screen for configuring the site's payment methods will be displayed.
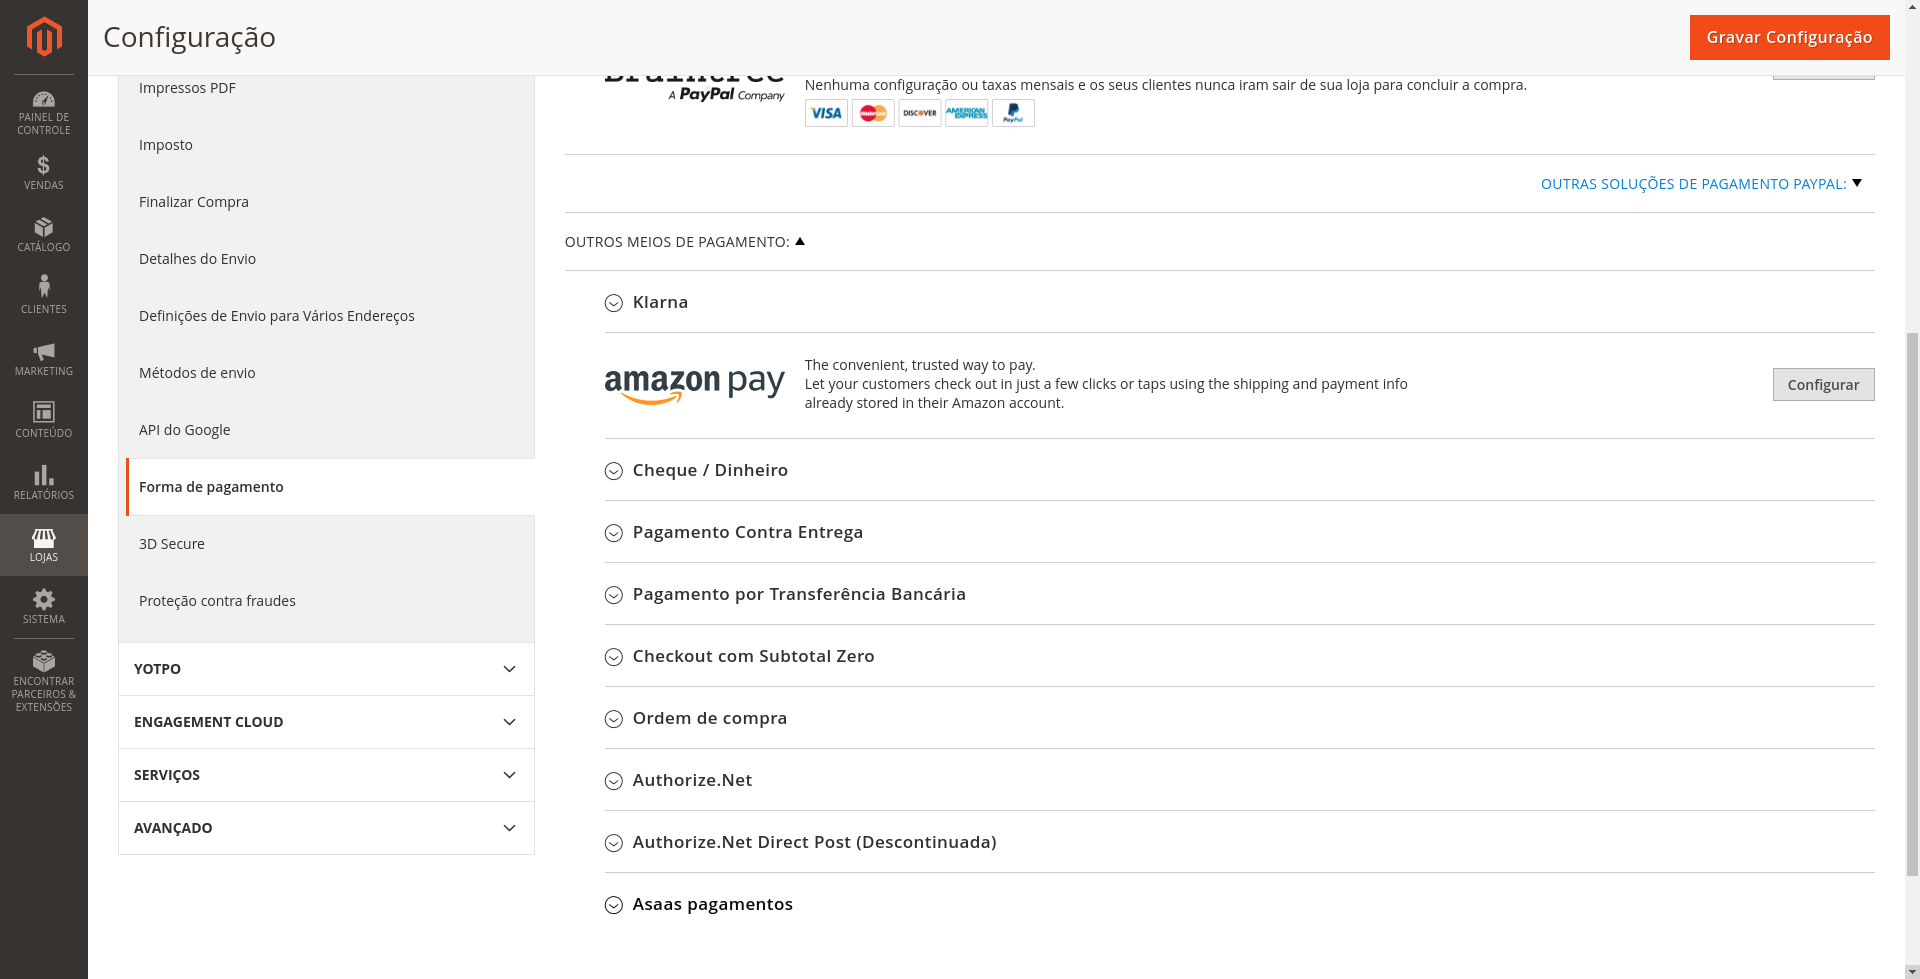
How to enable Asaas on your site
By expanding the "Asaas payments" payment method, you will find the option that enables the module completely. Simply select "Yes" to activate it.
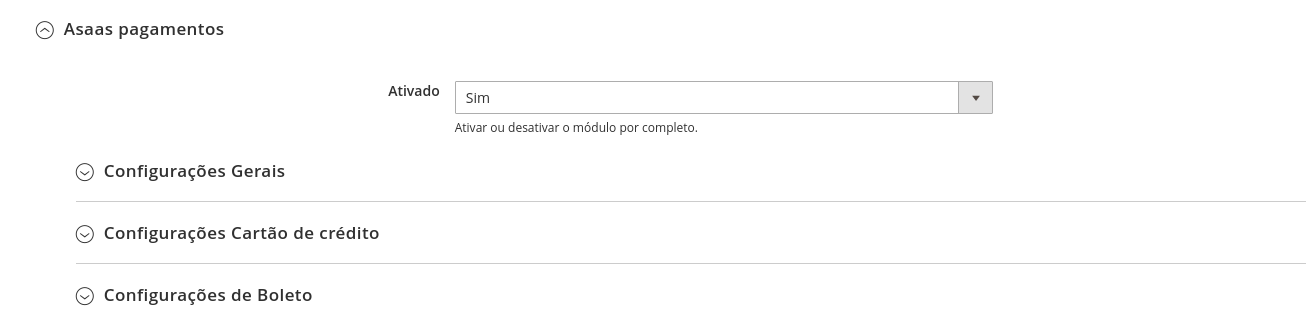
Next, there are the general settings, credit card settings, bank slip settings and Pix settings.
ImportantFor all the settings below to work, all previous steps must have been completed.
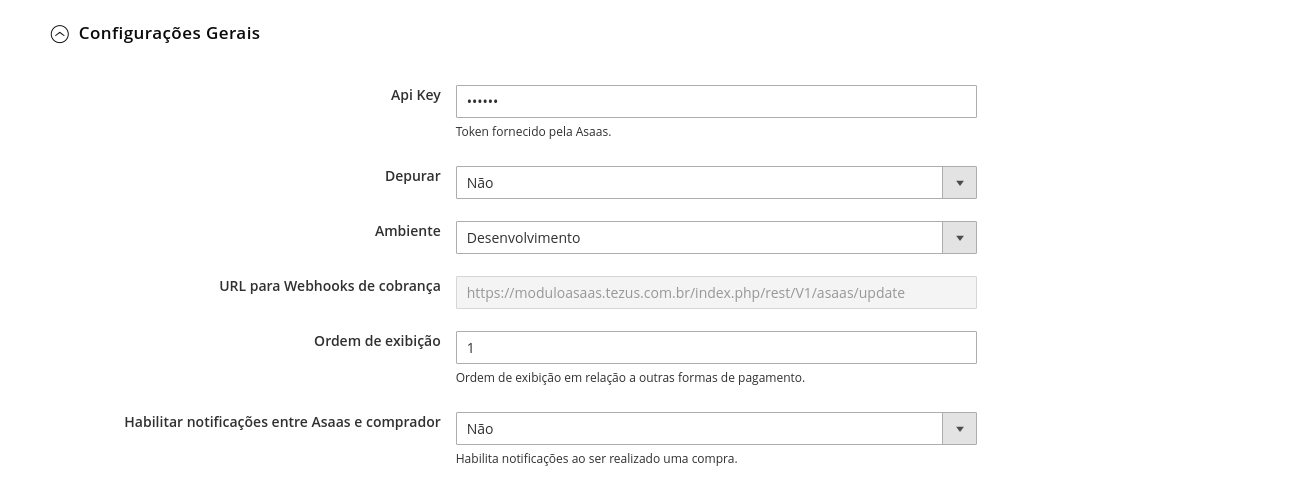
General Settings
-
API Key
- Integration key for the Asaas account. Production and sandbox tokens are different. To generate your API Key, access your Asaas account (in the required environment), and from the user menu access the "Integrations" option. On this screen, click on "Generate new API Key" and copy the entire contents of the displayed key.
-
Environment
- Selects which environment version the site will use. The available environments are:
DevelopmentandProduction.
- Selects which environment version the site will use. The available environments are:
-
Charge Webhook URL
- URL that must be configured in the charge webhook on the Asaas website so that when the payment is approved, the order status is updated.
-
Display Order
- Defines the order in which enabled payment methods are shown on the checkout screen.
-
Enable notifications between Asaas and buyer
- Enables email messages informing buyers about payment status changes.
Credit Card Settings
-
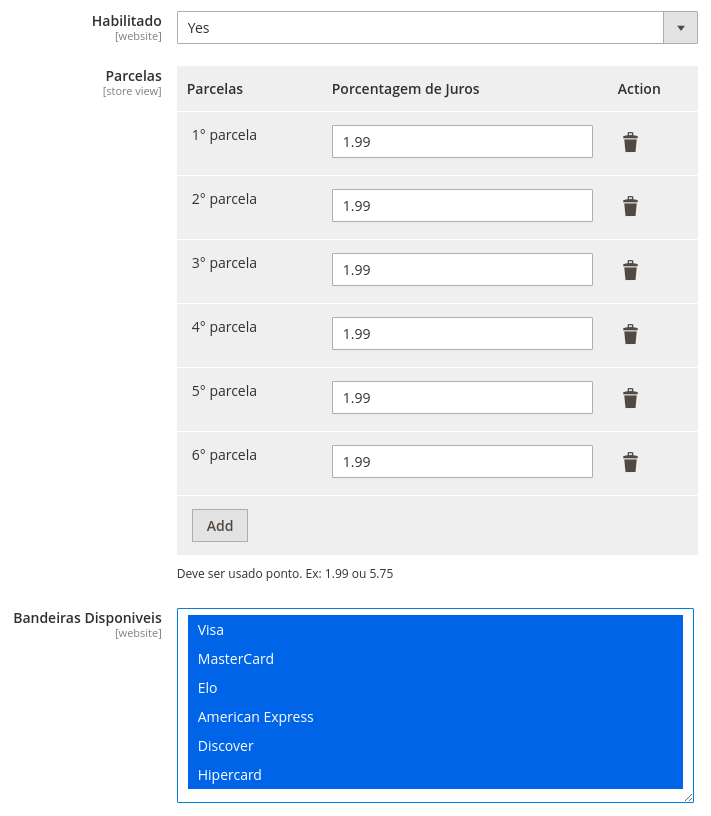
Enabled
- Enables or disables credit card payments.
-
Installments
- In addition to defining the maximum number of installments allowed, this field also applies an interest percentage to each installment if configured.
-
Credit Card Type
- Selects and displays the card brands available for payment in the credit card form.
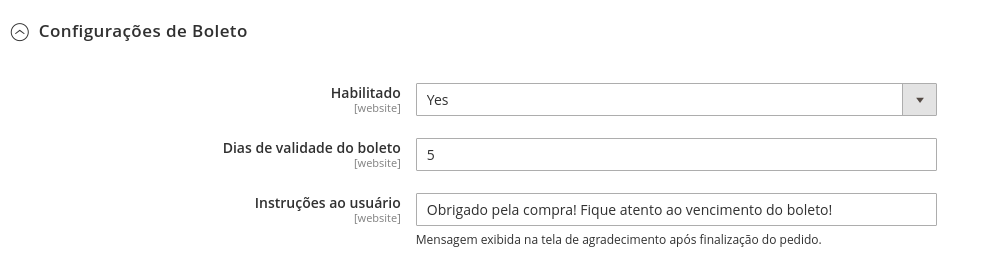
Bank Slip Settings
-
Enabled
- Enables or disables bank slip payments.
-
Bank slip expiration period
- Uses the current date and adds the configured number of days to determine the bank slip due date.
-
Instructions to the customer
- Message displayed on the thank-you page after the order is completed.
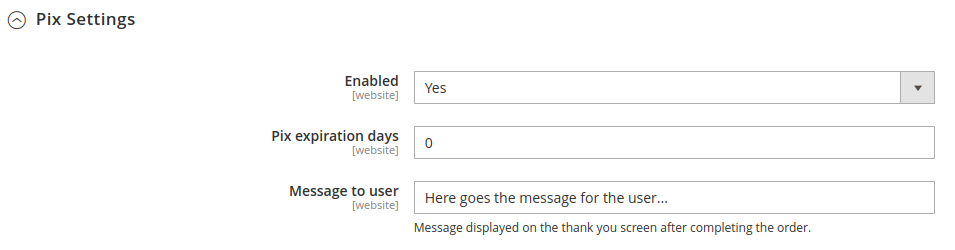
Pix Settings
-
Enabled
- Enables or disables Pix payments.
-
Pix expiration period
- Uses the current date and adds the configured number of days to determine the Pix expiration date.
-
Instructions to the customer
- Message displayed on the thank-you page after the order is completed.
Common errors
Invalid API Key
This may occur when the configured key belongs to another environment or was copied incorrectly.
Order is not updated automatically
This is usually related to webhook configuration issues.
Expired Pix
This may occur when the configured expiration period is insufficient for the operation.
Expired bank slip
This may occur when the configured number of days is too short.
Credit card installments unavailable
This may occur when the maximum number of installments or the interest rates have not been configured.
Best practices
Recommended
- Use the API Key corresponding to the correct environment.
- Test all payment methods after completing the configuration.
- Validate webhook operation.
- Review installment and interest settings before publishing the store.
- Monitor the first orders after changing the settings.
Related content
- Magento module installation.
- API Keys.
- Asaas account configuration.
- Magento + Asaas integration FAQ.
Updated 27 days ago