
Pix - Shopify
Using Asaas Pix with Shopify
By using the Asaas Pix App in your Shopify store, you guarantee a series of benefits to offer instant payments to your customers.
In addition to the almost immediate payment confirmation, you have all the features of the Asaas Digital Account for managing charges.
Among the main advantages are:
- easy integration (done in just a few clicks);
- transparent purchase experience;
- fast payment confirmation;
- support for refunds and reversals (via Asaas and Shopify).
When to use
The Asaas Pix App is recommended for stores that want to offer instant payments and reduce the time between completing the purchase and confirming the order.
It is especially recommended when:
- fast payment confirmation is important to speed up order release;
- the store wants to offer an alternative to credit card and bank slip;
- the customer prefers to make payments directly through the bank app.
The Asaas Pix App can be installed individually or together with the Asaas Bank Slip and Asaas Credit Card Apps, allowing multiple payment methods to be made available at the Shopify checkout.
AttentionIf you want to make Pix payments available, it is essential to generate a Pix key in your Asaas account through the Pix > My Keys menu.
If there is no registered Pix key, charge settlement may occur late, impacting order confirmation on Shopify.
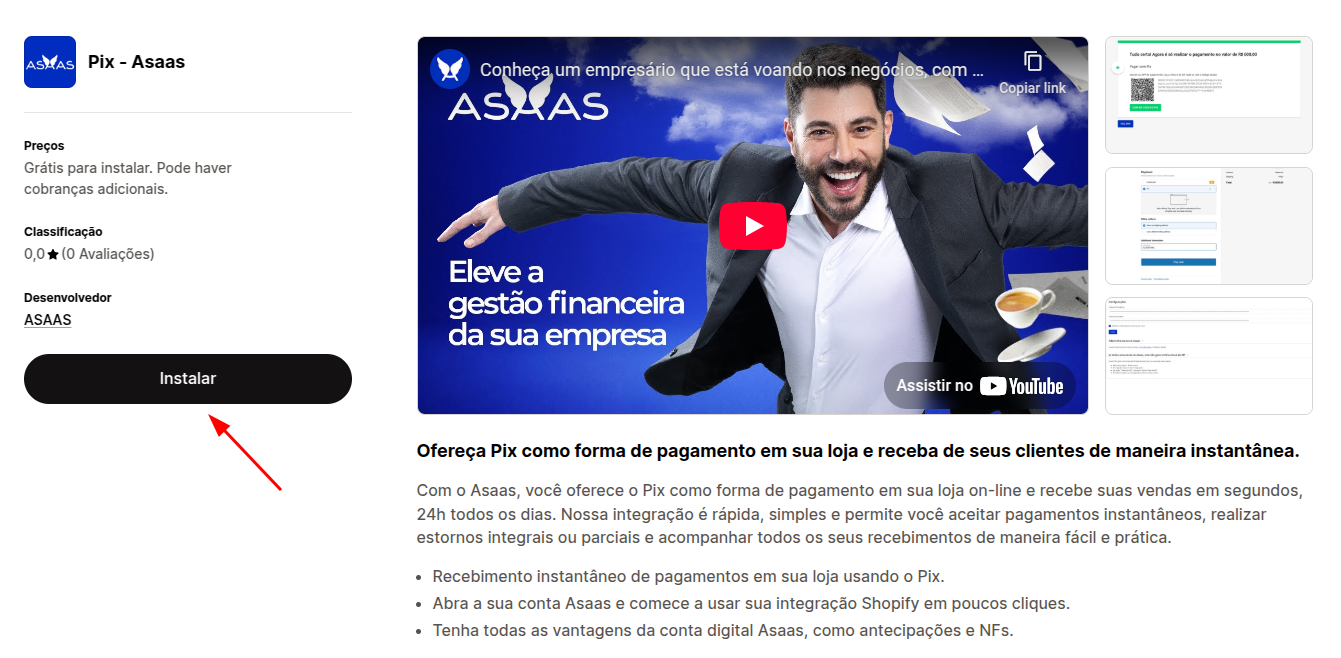
How to install the Asaas Pix App on Shopify?
Installing the Asaas Pix App is very simple.
First, access the application:
https://apps.shopify.com/pix-4?locale=pt-BR
As our publication on Shopify is recent, it may not yet be available in the search for payment providers. In this case, use the link above directly.
If you are already logged in to your store, simply click the Install button.
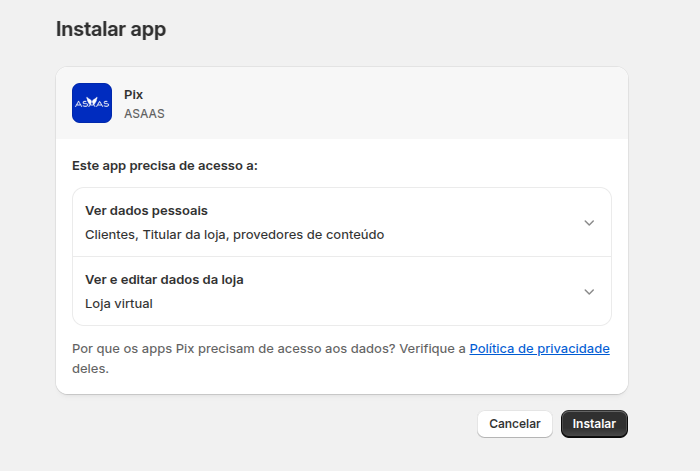
On the next screen, the permissions required for the application to work will be displayed.
If you agree, click Install again.
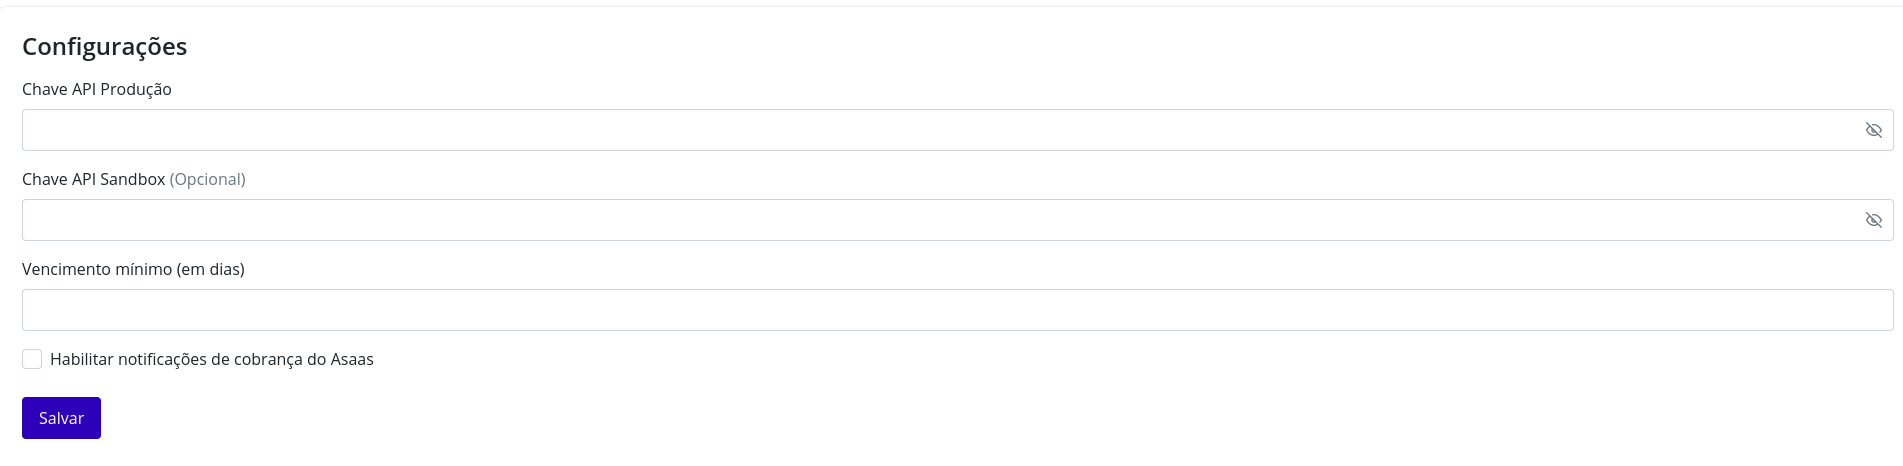
The next step will be to enter your Asaas API key.
You will be able to enter:
- Production API key (real transactions);
- Sandbox API key (tests).
To obtain your Production key, access the Integrations area of your Asaas account.
If you want to run tests, first create your Sandbox account at:
Then generate your key through the Integrations area of the Sandbox account.
Each installed application must have its own API key. To make identification easier, we recommend using a name such as:
Shopify Pix API Key
Once the key has been generated, copy it and enter it in the respective field.
Attention
- It will be mandatory to enter a Production API key.
- The Sandbox API key is optional.
- If both are entered, it will be possible to switch between Production and Sandbox using the Test mode option in the application settings.
- The API key is displayed only once during its creation.
- If it is lost, it will be necessary to generate a new key.
In the Enable Asaas charge notifications option, you can define whether you want to use Asaas messaging to charge the customer.
After that, click Save.
If everything has been entered correctly, the settings will be saved.
If any error occurs, check:
- whether the key belongs to the correct environment;
- whether the key was copied in full;
- whether the account has permission to use the API;
- whether the selected environment (Production or Sandbox) matches the entered key.
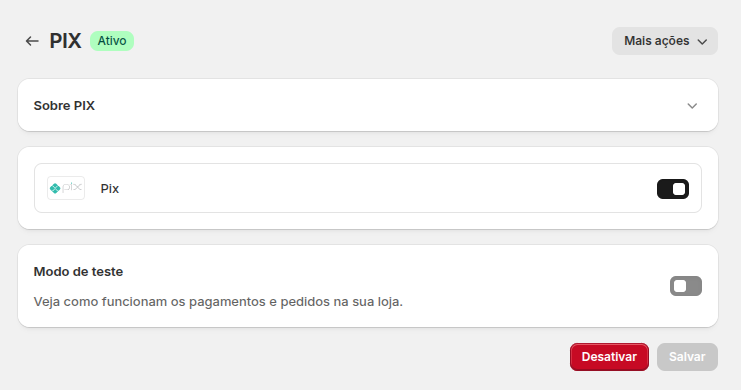
On the next screen, you will be able to activate the Asaas Pix App and choose between operating in Production or Sandbox using the Test mode option.
After confirming the settings, click Save.
And that’s it! Your Asaas Pix App will be installed and ready to process payments via Pix using Asaas.
Purchase experience
When the customer makes a purchase, they will be able to select the Pix payment method during checkout.
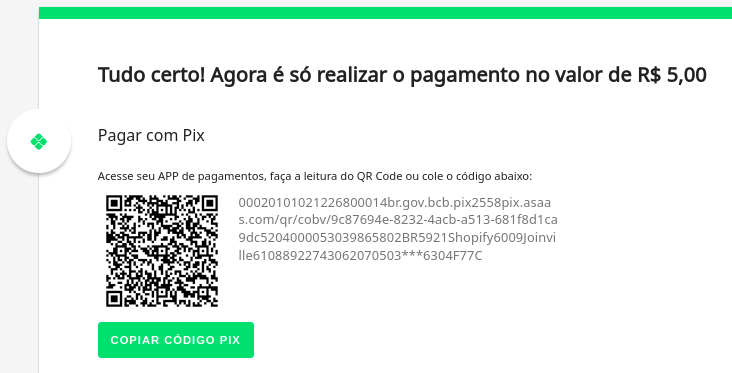
After clicking Pay Now, they will be redirected to the Asaas payment page, where they can make the payment using the Pix QR Code or the Pix Copy and Paste code.
The screen will be similar to the following:
Once the payment is confirmed, the customer will be automatically redirected to the Shopify thank-you page.
Flow example
Customer completes the purchase
↓
Selects Pix
↓
Is redirected to the Asaas payment page
↓
Makes the payment via Pix
↓
Payment confirmed
↓
Order updated in Shopify
↓
Customer is redirected to the thank-you page
Best practices
- Register a Pix key before putting the application into production.
- Use the Sandbox environment to validate the integration before publication.
- Check whether the API key matches the configured environment.
- After completing the installation, make a test payment to validate automatic order confirmation.
Related content
See also:
- Shopify;
- FAQ - Shopify;
- Asaas Bank Slip on Shopify;
- Asaas Credit Card on Shopify;
- Webhooks;
- Reversals.
Updated 19 days ago